
How to Add a MacOS Finder Quick Action to Convert Images to WebP Easily
Manuals & How-To's Mac OS X
Step 1: Install cwebp
If you have Homebrew:
brew install webpStep 2: Create the Quick Action
-
Open Automator (⌘+Space, type “Automator”)
-
Choose New Document → Quick Action (or choose “Quick Action” if the getting started wizard opens)
-
At the top of the workflow, set:
- “Workflow receives current” → image files
- “in” → Finder.app
-
From the actions library on the left, search for Run Shell Script and drag it into the workflow
-
Set:
- Shell:
/bin/zsh - Pass input: as arguments
- Shell:
-
Paste this script:
export PATH="/opt/homebrew/bin:/usr/local/bin:$PATH"
for f in "$@"; do
    dir=$(dirname "$f")
    base=$(basename "$f")
    name="${base%.*}"
    cwebp -q 85 "$f" -o "$dir/$name.webp"
done- Save it as something like Convert to WebP
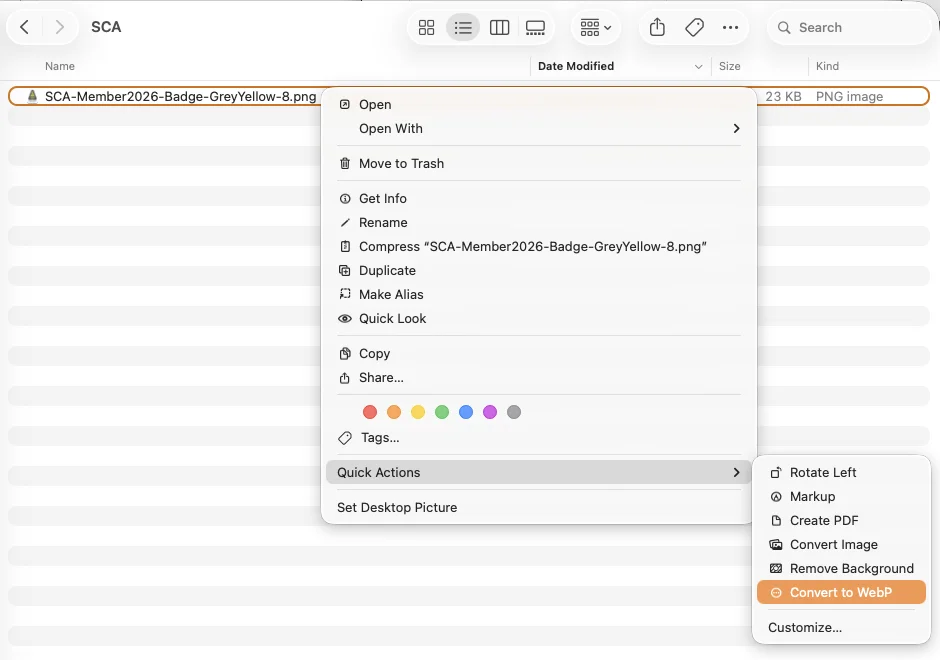
Step 3: Use it
Right-click any image in Finder → Quick Actions (or the Services submenu on older macOS) → Convert to WebP. The .webp file lands next to the original.
A couple of notes worth knowing:
-q 85is the quality setting. Drop to 75 for smaller files, bump to 95 for near-lossless. Add-losslessif you want true lossless.- The
export PATHline matters because Automator doesn’t inherit your shell’s PATH, so it can’t findcwebpwithout it./opt/homebrew/binis for Apple Silicon,/usr/local/binis for Intel — leaving both covers either machine. - If you want to replace the original instead of adding alongside it, append
&& rm "$f"inside the loop.